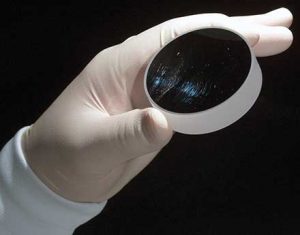

Surface Quality
The surface quality of an optical surface describes its cosmetic appearance and includes such defects as scratches and pits, or digs. In most cases, these surface defects are purely cosmetic and do not significantly affect system performance, though, they can cause a small loss in system throughput and a small increase in scattered light. However, certain surfaces are more sensitive to these effects such as:
(1) surfaces at image planes because these defects are in focus and
(2) surfaces that see high power levels because these defects can cause increased absorption of energy and damage the optic.
The most common specification used for surface quality is the scratch-dig specification described by MIL-PRF-13830B. The scratch designation is determined by comparing the scratches on a surface to a set of standard scratches under controlled lighting conditions. Therefore the scratch designation does not describe the actual scratch itself, but rather compares it to a standardized scratch according to the MIL-Spec. The dig designation does directly relate to the dig, or small pit in the surface. The dig designation is calculated at the diameter of the dig in microns divided by 10. Scratch-dig specifications of 80-50 are typically considered standard quality, 60-40 precision quality, and 20-10 high precision quality.
Surface Flatness
Surface flatness is a type of surface accuracy specification that measures the deviation of a flat surface such as that of a mirror, window, prism, or plano-lens. This deviation can be measured using an optical flat, which is a high quality, highly precise flat reference surface used to compare the flatness of a test piece. When the flat surface of the test optic is placed against the optical flat, fringes appear whose shape dictates the surface flatness of the optic under inspection. If the fringes are evenly spaced, straight, and parallel, then the optical surface under test is at least as flat as the reference optical flat. If the fringes are curved, the number of fringes between two imaginary lines, one tangent to the center of a fringe and one through the ends of that same fringe, indicate the flatness error. The deviations in flatness are often measured in values of waves (λ), which are multiples of the wavelength of the testing source. One fringe corresponds to 1/2 of a wave. 1λ flatness is considered typical grade, λ/4 flatness is considered precision grade, and λ/20 is considered high precision grade.
Power
Power, a type of surface accuracy specification, applies to curved optical surfaces, or surfaces with power. It is tested in a fashion similar to flatness, in that a curved surface is compared against a reference surface with a highly calibrated radius of curvature. Using the same principle of interference caused by the air gaps between the two surfaces, the interference’s pattern of fringes is used to describe the deviation of the test surface from the reference surface. A deviation from the reference piece will create a series of rings, known as Newton's Rings. The more rings present, the larger the deviation. The number of dark or light rings, not the sum of both light and dark, corresponds to twice the number of waves of error.
Irregularity
Irregularity, a type of surface accuracy specification, describes how the shape of a surface deviates from the shape of a reference surface. It is obtained from the same measurement as power. Regularity refers to the sphericity of the circular fringes that are formed from the comparison of the test surface to the reference surface. When the power of a surface is more than 5 fringes, it is difficult to detect small irregularities of less than 1 fringe. Therefore it is common practice to specify surfaces with a ratio of power to irregularity of approximately 5:1.
Surface Finish
Surface finish, also known as surface roughness, measures small scale irregularities on a surface. They are usually an unfortunate by-product of the polishing process. Rough surfaces tend to wear faster than smooth surfaces and may not be suitable for some applications, especially those with lasers or intense heat, due to possible nucleation sites that can appear in small cracks or imperfections. Manufacturing tolerances for surface finish range from 50A RMS for typical quality, 20A RMS for precision quality, and 5A RMS for high quality.