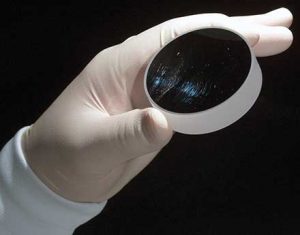

In the United States, since 1954 optical surface quality has usually been described following military standard MIL-PRF-13830B and its predecessors. The rating is formatted as two numbers separated by a hyphen, or sometimes a slash, for example 80-50. The first is the scratch number and the second the dig number.
The dig number is the diameter, measured in hundredths of a millimeter, of a circle which would enclose the biggest dig in the surface.
Dig numbers are the actual diameters of defects allowed, specified in units of 1/100mm. In the case of irregular shaped digs the diameter shall be taken as the average of the maximum length and maximum width.
So, if a lens surface is rated 80-50, somewhere on that surface is a pit 0.5mm in diameter, about half a pinhead. The standard only allows one dig of the stated maximum size per 20mm of lens diameter, and there are additional constraints, such as that if the dig number is 10 or less, every dig edge must be at least 1 millimeter away from the edge of its nearest neighbor. Bubbles are treated as digs.
The scratch number is a less objective measurement. It is arrived at through a method similar to the one machinists use to rate the smoothness of a machined surface, by visual comparison to a set of calibrated samples.3 MIL-PRF-13830B describes dark-field lighting conditions under which the part being evaluated is to be viewed together with working scratch standards. The evaluator picks the best match, essentially matching the brightnesses of the two surfaces by eye. Because of the nature of the visual matching procedure, it is possible for different evaluators to assign different scratch numbers to the same part. The MIL standard includes other requirements, such as that the combined length of the biggest scratches can't be more than ? the diameter of the lens. But the scratch number is not a direct measurement of any dimension of the scratches, but of scratch visibility.
The scratch standards are described in U.S. Army ARDEC drawing “Surface Quality Standards for Optical Elements (scratch and dig) Drawing C7641866.” (Revision R, as of 2010). The actual prototypes are kept at the Picatinny Arsenal in New Jersey. For each scratch number (80, 60, 40, 20, 10) there is a pair of prototypes, one defining the maximum allowable visibility for that scratch number and another defining the lowest allowable visibility.
The military and its vendors can refer to these prototypes, or to working standards directly calibrated against them. Everyone else must rely on commercially available copies of the prototypes, a set of which costs several thousand dollars. Working standards from commercial suppliers differ slightly from maker to maker, so it is a good idea to include in a surface quality specification the name of the manufacturer of the working standards to which the part is to be compared.
Some examples of ratings appropriate for various uses:
| 80-50 | cosmetic. Elements far from the image plane. |
| 60-40 | many commercial lenses |
| 40-50 | central zone of military eyepieces |
| 40-20 | Low power lasers. |
| 20-10 | Medium power lasers. Central area of high-quality eyeglasses. |
| 10-5 | Research with high power lasers. |
Another military standard covered the surface quality of the coating of optical parts.? For transparent coatings, the standard applied the method and two-numeral designation of the MIL-0-13830 standard. But for opaque coatings, it adopted designations consisting of “two letters separated by a hyphen.”
Dig letters were defined as follows (sec. 3.3.5.2.1):
| Dig letter | A | B | C | D | E | F | G | H |
| Diameter in mm | 0.05 | 0.10 | 0.20 | 0.30 | 0.40 | 0.50 | 0.70 | 1.00 |
Scratch letters were defined as follows (sec. 3.3.5.2.2)
| Scratch letter | A | B | C | D | E | F | G |
| Scratch width (microns) | 5 | 10 | 20 | 40 | 60 | 80 | 120 |
In this case, unlike MIL-PRF-13830B, the actual width is being used to characterize a scratch. The standard states:
The length and width of scratches, and the dig (hole) diameters shall be determined by use of interferometry, microscopic measuring devices, calibrated precision comparators, or similar applicable precision measuring devices. The width, length and density of all scratches in the coating shall conform to the requirements of 3.3.5.2.?
In other words, the resulting rating can serve functional, and not just cosmetic, purposes.
1. Performance Specification. Optical Components for Fire Control Instruments: General Specification Governing the Manufacture, Assembly, and Inspection of. (MIL-PRF-13830B, 9 January 1997). Section 3.5.1.1, Designation of defect size.The standard can be downloaded at www.everyspec.com.
2. Section 3.5.3.1, Dig designation.
3. Some suppliers of optical parts give a scratch number which is the maximum scratch width in microns. This usage does not conform to the MIL-PRF-13830B standard. Such suppliers will usually state on the page with the part's specifications that that is how they are defining scratch number. In 1954, Revision H of Drawing C7641866 said the scratch number was the width in microns. Two years later Revision J indicated the scratch number was the width in tenths of a micron. This sowed confusion, but the mil standard and the prototypes at the Picatinny Arsenal remained unchanged; i.e., the standard remained a visibility standard, not a width standard.
4. Coating, Single or Multi-Layer, Durability Requirement for (MIL-C-48497A, 8 September 1980). See 3.3.5.1 and 3.3.5.2. The standard can be downloaded at www.everyspec.com. It was inactivated for new design on 14 March 1997.
5. MIL-C-48497A, section 4.5.2.5.2 Opaque coated surfaces.